This article was originally published at Azure Front Door with ARO ( Azure Red Hat OpenShift ) | Red Hat Cloud Experts
Securing exposing an Internet facing application with a private ARO Cluster.
When you create a cluster on ARO you have several options in making the cluster public or private. With a public cluster you are allowing Internet traffic to the api and *.apps endpoints. With a private cluster you can make either or both the api and .apps endpoints private.
How can you allow Internet access to an application running on your private cluster where the .apps endpoint is private? This document will guide you through using Azure Frontdoor to expose your applications to the Internet. There are several advantages of this approach, namely your cluster and all the resources in your Azure account can remain private, providing you an extra layer of security. Azure FrontDoor operates at the edge so we are controlling traffic before it even gets into your Azure account. On top of that, Azure FrontDoor also offers WAF and DDoS protection, certificate management and SSL Offloading just to name a few benefits.
Adopted from ARO Reference Architecture
Prerequisites
- az cli
- oc cli
- a custom domain
- a DNS zone that you can easily modify
To build and deploy the application
Make sure to use the same terminal session while going through guide for all commands as we will reference envrionment variables set or created through the guide.
Get Started
- Create a private ARO cluster.Follow this guide to Create a private ARO cluster or simply run this bash script
Set Evironment Variables
1. Manually set environment variables
AROCLUSTER=<cluster name>

ARORG=<resource group for the cluster>

AFD_NAME=<name you want to use for the front door instance>

DOMAIN='e.g. aro.kmobb.com'  This is the domain that you will be adding to Azure DNS to manage.

ARO_APP_FQDN='e.g. minesweeper.aro.kmobb.com'
(note - we will be deploying an application called minesweeper to test front door.  Select a domain you would like to use for the application.  For example minesweeper.aro.kmobb.com ... where aro.kmobb.com is the domain you manage and have DNS access to.)

AFD_MINE_CUSTOM_DOMAIN_NAME='minesweeper-aro-kmobb-com'
(note - this should be your domain name without and .'s for example minesweeper-aro-kmobb-com)

PRIVATEENDPOINTSUBNET_PREFIX= subnet in the VNET you cluster is in.  If you following the example above to create a custer where you virtual network is 10.0.0.0/20 then you can use '10.0.6.0/24'

PRIVATEENDPOINTSUBNET_NAME='PrivateEndpoint-subnet'2. Set environment variables with Bash
UNIQUEID=$RANDOM

ARO_RGNAME=$(az aro show -n $AROCLUSTER -g $ARORG --query "clusterProfile.resourceGroupId" -o tsv | sed 's/.*\///')

LOCATION=$(az aro show --name $AROCLUSTER --resource-group $ARORG --query location -o tsv)

INTERNAL_LBNAME=$(az network lb list --resource-group $ARO_RGNAME --query "[? contains(name, 'internal')].name" -o tsv)

WORKER_SUBNET_NAME=$(az aro show --name $AROCLUSTER --resource-group $ARORG --query 'workerProfiles[0].subnetId' -o tsv | sed 's/.*\///')

WORKER_SUBNET_ID=$(az aro show --name $AROCLUSTER --resource-group $ARORG --query 'workerProfiles[0].subnetId' -o tsv)

VNET_NAME=$(az network vnet list -g $ARORG --query '[0].name' -o tsv)

LBCONFIG_ID=$(az network lb frontend-ip list -g $ARO_RGNAME --lb-name $INTERNAL_LBNAME --query "[? contains(subnet.id,'$WORKER_SUBNET_ID')].id" -o tsv)

LBCONFIG_IP=$(az network lb frontend-ip list -g $ARO_RGNAME --lb-name $INTERNAL_LBNAME --query "[? contains(subnet.id,'$WORKER_SUBNET_ID')].privateIPAddress" -o tsv)Create a Private Link Service
After we have the cluster up and running, we need to create a private link service. The private link service will provide private and secure connectivity between the Front Door Service and our cluster.
1. Disable the worker subnet private link service network policy for the worker subnet
az network vnet subnet update \
--disable-private-link-service-network-policies true \
--name $WORKER_SUBNET_NAME \
--resource-group $ARORG \
--vnet-name $VNET_NAME2. Create a private link service targeting the worker subnets
az network private-link-service create \
--name $AROCLUSTER-pls \
--resource-group $ARORG \
--private-ip-address-version IPv4 \
--private-ip-allocation-method Dynamic \
--vnet-name $VNET_NAME \
--subnet $WORKER_SUBNET_NAME \
--lb-frontend-ip-configs $LBCONFIG_ID

privatelink_id=$(az network private-link-service show -n $AROCLUSTER-pls -g $ARORG --query 'id' -o tsv)Create and Configure an instance of Azure Front Door
1. Create a Front Door Instance
az afd profile create \
--resource-group $ARORG \
--profile-name $AFD_NAME \
--sku Premium_AzureFrontDoor

afd_id=$(az afd profile show -g $ARORG --profile-name $AFD_NAME --query 'id' -o tsv)2. Create an endpoint for the ARO Internal Load Balancer
az afd endpoint create \
--resource-group $ARORG \
--enabled-state Enabled \
--endpoint-name 'aro-ilb'$UNIQUEID \
--profile-name $AFD_NAME3. Create a Front Door Origin Group that will point to the ARO Internal Loadbalancer
az afd origin-group create \
--origin-group-name 'afdorigin' \
--probe-path '/' \
--probe-protocol Http \
--probe-request-type GET \
--probe-interval-in-seconds 100 \
--profile-name $AFD_NAME \
--resource-group $ARORG \
--probe-interval-in-seconds 120 \
--sample-size 4 \
--successful-samples-required 3 \
--additional-latency-in-milliseconds 504. Create a Front Door Origin with the above Origin Group that will point to the ARO Internal Loadbalancer
az afd origin create \
--enable-private-link true \
--private-link-resource $privatelink_id \
--private-link-location $LOCATION \
--private-link-request-message 'Private link service from AFD' \
--weight 1000 \
--priority 1 \
--http-port 80 \
--https-port 443 \
--origin-group-name 'afdorigin' \
--enabled-state Enabled \
--host-name $LBCONFIG_IP \
--origin-name 'afdorigin' \
--profile-name $AFD_NAME \
--resource-group $ARORG5. Approve the private link connection
privatelink_pe_id=$(az network private-link-service show -n $AROCLUSTER-pls -g $ARORG --query 'privateEndpointConnections[0].id' -o tsv)

az network private-endpoint-connection approve \
--description 'Approved' \
--id $privatelink_pe_id6. Add your custom domain to Azure Front Door
az afd custom-domain create \
--certificate-type ManagedCertificate \
--custom-domain-name $AFD_MINE_CUSTOM_DOMAIN_NAME \
--host-name $ARO_APP_FQDN \
--minimum-tls-version TLS12 \
--profile-name $AFD_NAME \
--resource-group $ARORG7. Create an Azure Front Door endpoint for your custom domain
az afd endpoint create \
--resource-group $ARORG \
--enabled-state Enabled \
--endpoint-name 'aro-mine-'$UNIQUEID \
--profile-name $AFD_NAME8. Add an Azure Front Door route for your custom domain
az afd route create \
--endpoint-name 'aro-mine-'$UNIQUEID \
--forwarding-protocol HttpOnly \
--https-redirect Disabled \
--origin-group 'afdorigin' \
--profile-name $AFD_NAME \
--resource-group $ARORG \
--route-name 'aro-mine-route' \
--supported-protocols Http Https \
--patterns-to-match '/*' \
--custom-domains $AFD_MINE_CUSTOM_DOMAIN_NAME9. Update DNS
Get a validation token from Front Door so Front Door can validate your domain
afdToken=$(az afd custom-domain show \
--resource-group $ARORG \
--profile-name $AFD_NAME \
--custom-domain-name $AFD_MINE_CUSTOM_DOMAIN_NAME \
--query "validationProperties.validationToken"
-o tsv)10. Create a DNS Zone
az network dns zone create -g $ARORG -n $DOMAINYou will need to configure your nameservers to point to azure. The output of running this zone create will show you the nameservers for this record that you will need to set up within your domain registrar.
Create a new text record in your DNS server
az network dns record-set txt add-record -g $ARORG -z $DOMAIN -n _dnsauth.$(echo $ARO_APP_FQDN | sed 's/\..*//') --value $afdToken --record-set-name _dnsauth.$(echo $ARO_APP_FQDN | sed 's/\..*//')11. Check if the domain has been validated:
Note this can take several hours Your FQDN will not resolve until Front Door validates your domain.
az afd custom-domain list -g $ARORG --profile-name $AFD_NAME --query "[? contains(hostName, '$ARO_APP_FQDN')].domainValidationState"12. Add a CNAME record to DNS
Get the Azure Front Door endpoint:
afdEndpoint=$(az afd endpoint show -g $ARORG --profile-name $AFD_NAME --endpoint-name aro-mine-$UNIQUEID --query "hostName" -o tsv)Create a cname record for the application
az network dns record-set cname set-record -g $ARORG -z $DOMAIN \
-n $(echo $ARO_APP_FQDN | sed 's/\..*//') -z $DOMAIN -c $afdEndpointDeploy an application
Now the fun part, let’s deploy an application! We will be deploying a Java based application called microsweeper . This is an application that runs on OpenShift and uses a PostgreSQL database to store scores. With ARO being a first class service on Azure, we will create an Azure Database for PostgreSQL service and connect it to our cluster with a private endpoint.
1. Create a Azure Database for PostgreSQL servers service
az postgres server create --name microsweeper-database --resource-group $ARORG --location $LOCATION --admin-user quarkus --admin-password r3dh4t1! --sku-name GP_Gen5_2

POSTGRES_ID=$(az postgres server show -n microsweeper-database -g $ARORG --query 'id' -o tsv)2. Create a private endpoint connection for the database
az network vnet subnet create \
--resource-group $ARORG \
--vnet-name $VNET_NAME \
--name $PRIVATEENDPOINTSUBNET_NAME \
--address-prefixes $PRIVATEENDPOINTSUBNET_PREFIX \
--disable-private-endpoint-network-policies true

az network private-endpoint create \
--name 'postgresPvtEndpoint' \
--resource-group $ARORG \
--vnet-name $VNET_NAME \
--subnet $PRIVATEENDPOINTSUBNET_NAME \
--private-connection-resource-id $POSTGRES_ID \
--group-id 'postgresqlServer' \
--connection-name 'postgresdbConnection'3. Create and configure a private DNS Zone for the Postgres database
az network private-dns zone create \
--resource-group $ARORG \
--name 'privatelink.postgres.database.azure.com'

az network private-dns link vnet create \
--resource-group $ARORG \
--zone-name 'privatelink.postgres.database.azure.com' \
--name 'PostgresDNSLink' \
--virtual-network $VNET_NAME \
--registration-enabled false

az network private-endpoint dns-zone-group create \
--resource-group $ARORG \
--name 'PostgresDb-ZoneGroup' \
--endpoint-name 'postgresPvtEndpoint' \
--private-dns-zone 'privatelink.postgres.database.azure.com' \
--zone-name 'postgresqlServer'

NETWORK_INTERFACE_ID=$(az network private-endpoint show --name postgresPvtEndpoint --resource-group $ARORG --query 'networkInterfaces[0].id' -o tsv)

POSTGRES_IP=$(az resource show --ids $NETWORK_INTERFACE_ID --api-version 2019-04-01 --query 'properties.ipConfigurations[0].properties.privateIPAddress' -o tsv)

az network private-dns record-set a create --name $UNIQUEID-microsweeper-database --zone-name privatelink.postgres.database.azure.com --resource-group $ARORG

az network private-dns record-set a add-record --record-set-name $UNIQUEID-microsweeper-database --zone-name privatelink.postgres.database.azure.com --resource-group $ARORG -a $POSTGRES_IP4. Create a postgres database that will contain scores for the minesweeper application
az postgres db create \
--resource-group $ARORG \
--name score \
--server-name microsweeper-databaseDeploy the minesweeper application
1. Clone the git repository
git clone https://github.com/rh-mobb/aro-workshop-app.git2. Change to the root directory
cd aro-workshop-app3. Ensure Java 1.8 is set at your Java version
mvn --versionLook for Java version – 1.8XXXX if not set to Java 1.8 you will need to set your JAVA_HOME variable to Java 1.8 you have installed. To find your java versions run:
java -versionthen export your JAVA_HOME variable
export JAVA_HOME=`/usr/libexec/java_home -v 1.8.0_332`4. Log into your openshift cluster
Before you deploy your application, you will need to be connected to a private network that has access to the cluster.
A great way to establish this connectity is with a VPN connection. Follow this guide to setup a VPN connection with your Azure account.
kubeadmin_password=$(az aro list-credentials --name $AROCLUSTER --resource-group $ARORG --query kubeadminPassword --output tsv)

apiServer=$(az aro show -g $ARORG -n $AROCLUSTER --query apiserverProfile.url -o tsv)

oc login $apiServer -u kubeadmin -p $kubeadmin_password5. Create a new OpenShift Project
oc new-project minesweeper6. Add the openshift extension to quarkus
quarkus ext add openshift7. Edit microsweeper-quarkus/src/main/resources/application.properties
Make sure your file looks like the one below, changing the IP address on line 3 to the private ip address of your postgres instance.
To find your Postgres private IP address run the following commands:
NETWORK_INTERFACE_ID=$(az network private-endpoint show --name postgresPvtEndpoint --resource-group $ARORG --query 'networkInterfaces[0].id' -o tsv)

az resource show --ids $NETWORK_INTERFACE_ID --api-version 2019-04-01 --query 'properties.ipConfigurations[0].properties.privateIPAddress' -o tsvSample microsweeper-quarkus/src/main/resources/application.properties
# Database configurations
%prod.quarkus.datasource.db-kind=postgresql
%prod.quarkus.datasource.jdbc.url=jdbc:postgresql://10.1.6.9:5432/score
%prod.quarkus.datasource.jdbc.driver=org.postgresql.Driver
%prod.quarkus.datasource.username=quarkus@microsweeper-database
%prod.quarkus.datasource.password=r3dh4t1!
%prod.quarkus.hibernate-orm.database.generation=drop-and-create
%prod.quarkus.hibernate-orm.database.generation=update

# OpenShift configurations
%prod.quarkus.kubernetes-client.trust-certs=true
%prod.quarkus.kubernetes.deploy=true
%prod.quarkus.kubernetes.deployment-target=openshift
%prod.quarkus.openshift.build-strategy=docker8. Build and deploy the quarkus application to OpenShift
quarkus build --no-tests9. Create a route to your custom domain Change the snippet below replacing your hostname for the host:
cat << EOF | oc apply -f -
apiVersion: route.openshift.io/v1
kind: Route
metadata:
  labels:
    app.kubernetes.io/name: microsweeper-appservice
    app.kubernetes.io/version: 1.0.0-SNAPSHOT
    app.openshift.io/runtime: quarkus
  name: microsweeper-appservice
  namespace: minesweeper
spec:
  host: minesweeper.aro.kmobb.com
  to:
    kind: Service
    name: microsweeper-appservice
    weight: 100
    targetPort:
      port: 8080
  wildcardPolicy: None
EOF10. Check the dns settings of your application.
Notice that the application URL is routed through Azure Front Door at the edge. The only way this application that is running on your cluster can be access is through Azure Front Door which is connected to your cluster through a private endpoint.
nslookup $ARO_APP_FQDNsample output:
Server:		2600:1700:850:d220::1
Address:	2600:1700:850:d220::1#53

Non-authoritative answer:
minesweeper.aro.kmobb.com	canonical name = aro-mine-13947-dxh0ahd7fzfyexgx.z01.azurefd.net.
aro-mine-13947-dxh0ahd7fzfyexgx.z01.azurefd.net	canonical name = star-azurefd-prod.trafficmanager.net.
star-azurefd-prod.trafficmanager.net	canonical name = dual.part-0013.t-0009.t-msedge.net.
dual.part-0013.t-0009.t-msedge.net	canonical name = part-0013.t-0009.t-msedge.net.
Name:	part-0013.t-0009.t-msedge.net
Address: 13.107.213.41
Name:	part-0013.t-0009.t-msedge.net
Address: 13.107.246.41Test the application
Point your broswer to your domain!!
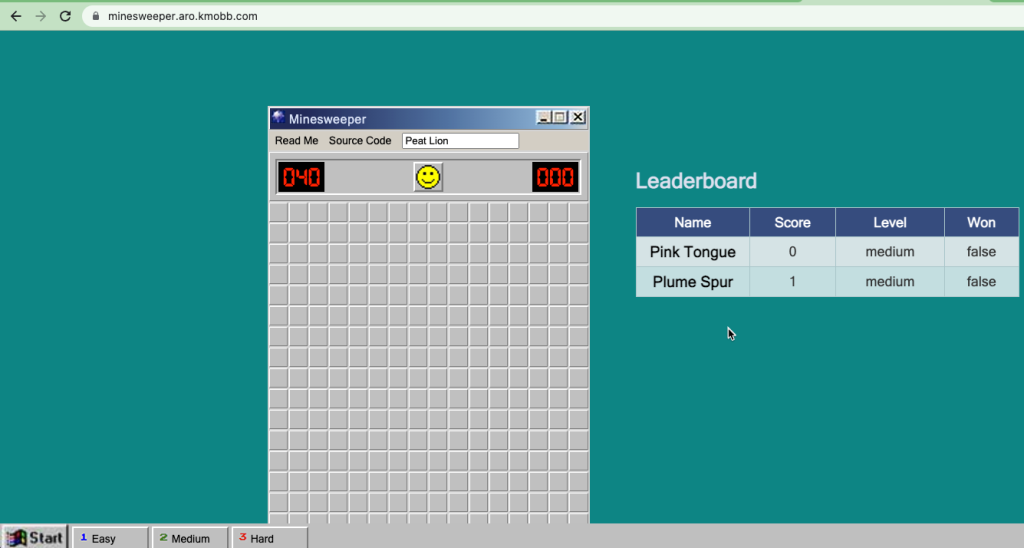
Clean up
To clean up everything you created, simply delete the resource group
az group delete -g $ARORG
Leave a Reply