This article was originally published at ARO with Nvidia GPU Workloads | Red Hat Cloud Experts
ARO guide to running Nvidia GPU workloads.
Prerequisites
- oc cli
- Helm
- jq, moreutils, and gettext package
- An ARO 4.14 cluster
Note: If you need to install an ARO cluster, please read our ARO Terraform Install Guide . Please be sure if you’re installing or using an existing ARO cluster that it is 4.14.x or higher.
Note: Please ensure your ARO cluster was created with a valid pull secret (to verify make sure you can see the Operator Hub in the cluster’s console). If not, you can follow these instructions.
Linux:
sudo dnf install jq moreutils gettextMacOS:
brew install jq moreutils gettext helm openshift-cliHelm Prerequisites
If you plan to use Helm to deploy the GPU operator, you will need do the following
1. Add the MOBB chart repository to your Helm
helm repo add mobb https://rh-mobb.github.io/helm-charts/2. Update your repositories
helm repo updateGPU Quota
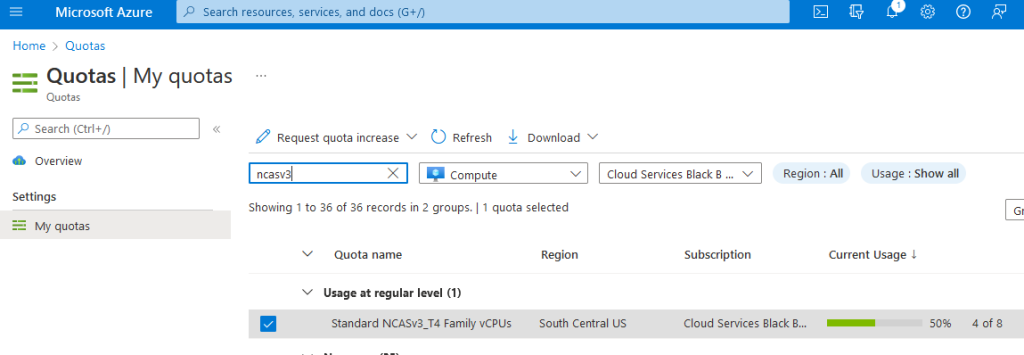
All GPU quotas in Azure are 0 by default. You will need to login to the azure portal and request GPU quota. There is a lot of competition for GPU workers, so you may have to provision an ARO cluster in a region where you can actually reserve GPU.
ARO supports the following GPU workers:
- NC4as T4 v3
- NC6s v3
- NC8as T4 v3
- NC12s v3
- NC16as T4 v3
- NC24s v3
- NC24rs v3
- NC64as T4 v3
Please remember that when you request quota that Azure is per core. To request a single NC4as T4 v3 node, you will need to request quota in groups of 4. If you wish to request an NC16as T4 v3 you will need to request quota of 16.
1. Login to Azure
Login to portal.azure.com , type “quotas” in search by, click on Compute and in the search box type “NCAsv3_T4”. Select the region your cluster is in (select checkbox) and then click Request quota increase and ask for quota (I chose 8 so i can build two demo clusters of NC4as T4s). The Helm chart we use below will request a single Standard_NC4as_T4_v3 machine.
2. Configure quota
Log in to your ARO cluster
1. Login to OpenShift – we’ll use the kubeadmin account here but you can login with your user account as long as you have cluster-admin.
oc login <apiserver> -u kubeadmin -p <kubeadminpass>GPU Machine Set
ARO still uses Kubernetes Machinsets to create a machine set. I’m going to export the first machine set in my cluster (az 1) and use that as a template to build a single GPU machine in southcentralus region 1.
You can create the machine set the easy way using Helm, or Manually. We recommend using the Helm chart method.
Option 1 – Helm
1. Create a new machine-set (replicas of 1), see the Chart’s values file for configuration options
helm upgrade --install -n openshift-machine-api \
gpu mobb/aro-gpu2. Switch to the proper namespace (project):
oc project openshift-machine-api3. Wait for the new GPU nodes to be available
watch oc -n openshift-machine-api get machinesNAME PHASE TYPE REGION ZONE AGE
xxxx-gpu-aro-gpu-southcentralus-9wnzz Running Standard_NC4as_T4_v3 southcentralus 1 11m
xxxx-master-0 Running Standard_D8s_v3 southcentralus 1 64m
...
...4. Skip past Option 2 – Manually to Install Nvidia GPU Operator
Option 2 – Manually
1. View existing machine setsFor ease of set up, I’m going to grab the first machine set and use that as the one I will clone to create our GPU machine set.
MACHINESET=$(oc get machineset -n openshift-machine-api -o=jsonpath='{.items[0]}' | jq -r '[.metadata.name] | @tsv')2. Save a copy of example machine set
oc get machineset -n openshift-machine-api $MACHINESET -o json > gpu_machineset.json3. Change the .metadata.name field to a new unique name
I’m going to create a unique name for this single node machine set that shows nvidia-worker- that follows a similar pattern as all the other machine sets.
jq '.metadata.name = "nvidia-worker-southcentralus1"' gpu_machineset.json| sponge gpu_machineset.json4. Ensure spec.replicas matches the desired replica count for the MachineSet
jq '.spec.replicas = 1' gpu_machineset.json| sponge gpu_machineset.json5. Change the .spec.selector.matchLabels.machine.openshift.io/cluster-api-machineset field to match the .metadata.name field
jq '.spec.selector.matchLabels."machine.openshift.io/cluster-api-machineset" = "nvidia-worker-southcentralus1"' gpu_machineset.json| sponge gpu_machineset.json6. Change the .spec.template.metadata.labels.machine.openshift.io/cluster-api-machineset to match the .metadata.name field
jq '.spec.template.metadata.labels."machine.openshift.io/cluster-api-machineset" = "nvidia-worker-southcentralus1"' gpu_machineset.json| sponge gpu_machineset.json7. Change the spec.template.spec.providerSpec.value.vmSize to match the desired GPU instance type from Azure.
The machine we’re using is Standard_NC4as_T4_v3.
jq '.spec.template.spec.providerSpec.value.vmSize = "Standard_NC4as_T4_v3"' gpu_machineset.json | sponge gpu_machineset.json8. Change the spec.template.spec.providerSpec.value.zone to match the desired zone from Azure
jq '.spec.template.spec.providerSpec.value.zone = "1"' gpu_machineset.json | sponge gpu_machineset.json9. Delete the .status section of the yaml file
jq 'del(.status)' gpu_machineset.json | sponge gpu_machineset.json10. Verify the other data in the yaml file.
Create GPU machine set
These steps will create the new GPU machine. It may take 10-15 minutes to provision a new GPU machine. If this step fails, please login to the azure portal and ensure you didn’t run across availability issues. You can go “Virtual Machines” and search for the worker name you created above to see the status of VMs.
1. Create GPU Machine set
oc create -f gpu_machineset.jsonThis command will take a few minutes to complete.
2. Verify GPU machine set
Machines should be getting deployed. You can view the status of the machine set with the following commands
oc get machineset -n openshift-machine-api
oc get machine -n openshift-machine-apiOnce the machines are provisioned, which could take 5-15 minutes, machines will show as nodes in the node list.
oc get nodesYou should see a node with the “nvidia-worker-southcentralus1” name it we created earlier.
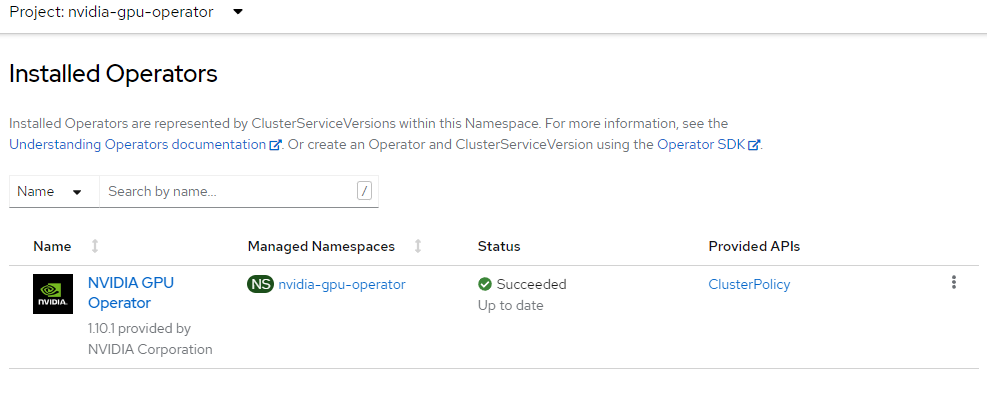
Install Nvidia GPU Operator
This will create the nvidia-gpu-operator name space, set up the operator group and install the Nvidia GPU Operator.
Like ealier you can do it the easy way with Helm, or the hard way by doing it manually.
Option 1 – Helm
1. Create namespaces
oc create namespace openshift-nfd
oc create namespace nvidia-gpu-operator2. Use the mobb/operatorhub chart to deploy the needed operators
helm upgrade -n nvidia-gpu-operator nvidia-gpu-operator \
  mobb/operatorhub --install \
--values https://raw.githubusercontent.com/rh-mobb/helm-charts/main/charts/nvidia-gpu/files/operatorhub.yaml3. Wait until the two operators are running
Note: If you see an error like Error from server (NotFound): deployments.apps “nfd-controller-manager” not found, wait a few minutes and try again.
oc wait --for=jsonpath='{.status.replicas}'=1 deployment \
  nfd-controller-manager -n openshift-nfd --timeout=600s
oc wait --for=jsonpath='{.status.replicas}'=1 deployment \
gpu-operator -n nvidia-gpu-operator --timeout=600s4. Install the Nvidia GPU Operator chart
helm upgrade --install -n nvidia-gpu-operator nvidia-gpu \
mobb/nvidia-gpu --disable-openapi-validation5. Skip past Option 2 – Manually to Validate GPU
Option 2 – Manually
1. Create Nvidia namespace
cat <<EOF | oc apply -f -
apiVersion: v1
kind: Namespace
metadata:
  name: nvidia-gpu-operator
EOF2. Create Operator Group
cat <<EOF | oc apply -f -
apiVersion: operators.coreos.com/v1
kind: OperatorGroup
metadata:
  name: nvidia-gpu-operator-group
  namespace: nvidia-gpu-operator
spec:
  targetNamespaces:
  - nvidia-gpu-operator
EOF3. Get latest nvidia channel
CHANNEL=$(oc get packagemanifest gpu-operator-certified -n openshift-marketplace -o jsonpath='{.status.defaultChannel}')If your cluster was created without providing the pull secret, the cluster won’t include samples or operators from Red Hat or from certified partners. This will result in the following error message:
Error from server (NotFound): packagemanifests.packages.operators.coreos.com “gpu-operator-certified” not found.
To add your Red Hat pull secret on an Azure Red Hat OpenShift cluster, follow this guidance .
1. Get latest nvidia package
PACKAGE=$(oc get packagemanifests/gpu-operator-certified -n openshift-marketplace -ojson | jq -r '.status.channels[] | select(.name == "'$CHANNEL'") | .currentCSV')2. Create Subscription
envsubst  <<EOF | oc apply -f -
apiVersion: operators.coreos.com/v1alpha1
kind: Subscription
metadata:
  name: gpu-operator-certified
  namespace: nvidia-gpu-operator
spec:
  channel: "$CHANNEL"
  installPlanApproval: Automatic
  name: gpu-operator-certified
  source: certified-operators
  sourceNamespace: openshift-marketplace
  startingCSV: "$PACKAGE"
EOF3. Wait for Operator to finish installing
Don’t proceed until you have verified that the operator has finished installing. It’s also a good point to ensure that your GPU worker is online.
Install Node Feature Discovery Operator
The node feature discovery operator will discover the GPU on your nodes and appropriately label the nodes so you can target them for workloads. We’ll install the NFD operator into the opneshift-ndf namespace and create the “subscription” which is the configuration for NFD.
Official Documentation for Installing Node Feature Discovery Operator
1. Set up Name Space
cat <<EOF | oc apply -f -
apiVersion: v1
kind: Namespace
metadata:
  name: openshift-nfd
EOF2. Create OperatorGroup
cat <<EOF | oc apply -f -
apiVersion: operators.coreos.com/v1
kind: OperatorGroup
metadata:
  generateName: openshift-nfd-
  name: openshift-nfd
  namespace: openshift-nfd
EOF3. Create Subscription
cat <<EOF | oc apply -f -
apiVersion: operators.coreos.com/v1alpha1
kind: Subscription
metadata:
  name: nfd
  namespace: openshift-nfd
spec:
  channel: "stable"
  installPlanApproval: Automatic
  name: nfd
  source: redhat-operators
  sourceNamespace: openshift-marketplace
EOF4. Wait for Node Feature discovery to complete installation
You can login to your openshift console and view operators or simply wait a few minutes. The next step will error until the operator has finished installing.
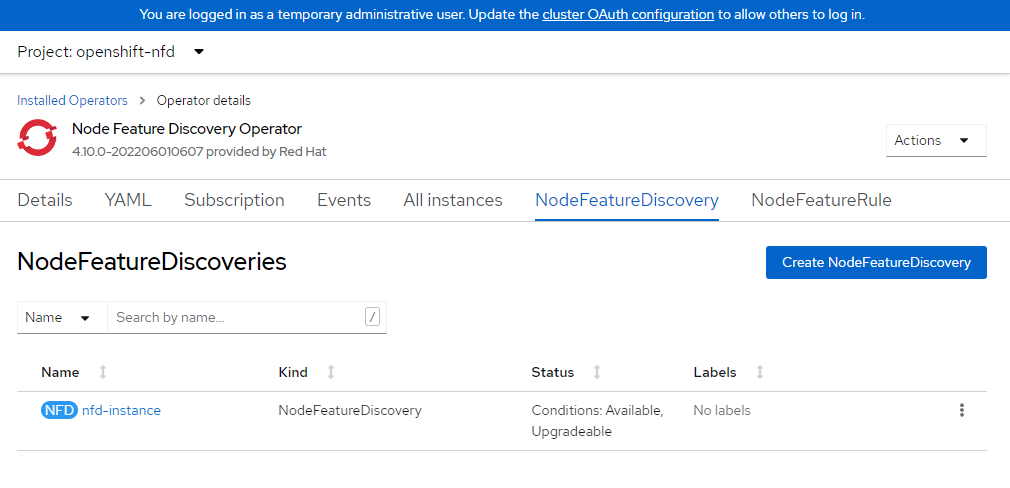
5. Create NFD Instance
cat <<EOF | oc apply -f -
kind: NodeFeatureDiscovery
apiVersion: nfd.openshift.io/v1
metadata:
  name: nfd-instance
  namespace: openshift-nfd
spec:
  customConfig:
    configData: {}
  operand:
    image: >-
      registry.redhat.io/openshift4/ose-node-feature-discovery@sha256:07658ef3df4b264b02396e67af813a52ba416b47ab6e1d2d08025a350ccd2b7b
    servicePort: 12000
  workerConfig:
    configData: |
      core:
        sleepInterval: 60s
      sources:
        pci:
          deviceClassWhitelist:
            - "0200"
            - "03"
            - "12"
          deviceLabelFields:
            - "vendor"
EOF6. Verify NFD is ready.
This operator should say Available in the status
Apply nVidia Cluster Config
We’ll now apply the nvidia cluster config. Please read the nvidia documentation on customizing this if you have your own private repos or specific settings. This will be another process that takes a few minutes to complete.
1. Apply cluster config
cat <<EOF | oc apply -f -
apiVersion: nvidia.com/v1
kind: ClusterPolicy
metadata:
  name: gpu-cluster-policy
spec:
  migManager:
    enabled: true
  operator:
    defaultRuntime: crio
    initContainer: {}
    runtimeClass: nvidia
    deployGFD: true
  dcgm:
    enabled: true
  gfd: {}
  dcgmExporter:
    config:
      name: ''
  driver:
    licensingConfig:
      nlsEnabled: false
      configMapName: ''
    certConfig:
      name: ''
    kernelModuleConfig:
      name: ''
    repoConfig:
      configMapName: ''
    virtualTopology:
      config: ''
    enabled: true
    use_ocp_driver_toolkit: true
  devicePlugin: {}
  mig:
    strategy: single
  validator:
    plugin:
      env:
        - name: WITH_WORKLOAD
          value: 'true'
  nodeStatusExporter:
    enabled: true
  daemonsets: {}
  toolkit:
    enabled: true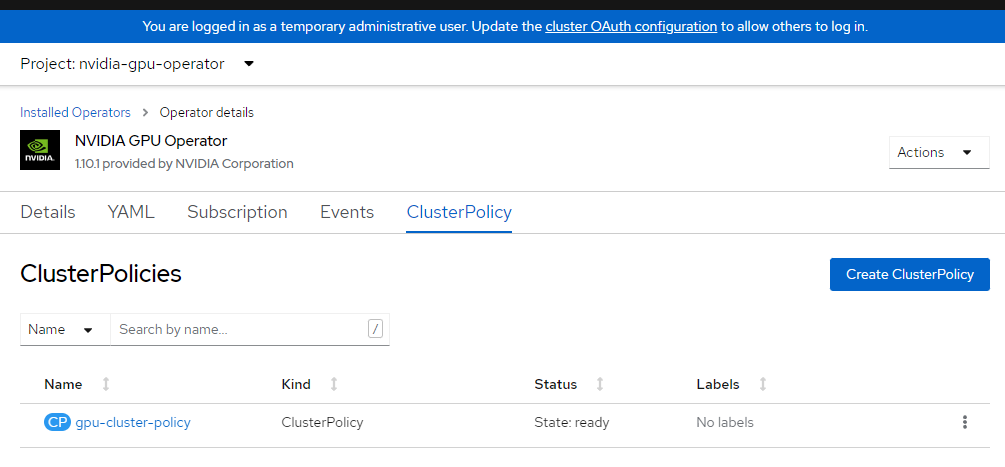
EOF2. Verify Cluster Policy
Login to OpenShift console and browse to operators and make sure you’re in nvidia-gpu-operator namespace. You should see it say State: Ready once everything is complete.
Validate GPU
It may take some time for the nVidia Operator and NFD to completely install and self-identify the machines. These commands can be ran to help validate that everything is running as expected.
1. Verify NFD can see your GPU(s)
oc describe node | egrep 'Roles|pci-10de' | grep -v masterYou should see output like:
Roles:              worker
feature.node.kubernetes.io/pci-10de.present=true2. Verify node labels
oc get node -l nvidia.com/gpu.presentNAME STATUS ROLES AGE VERSION
xxxxx-gpu-aro-gpu-southcentralus-9wnzz Ready worker 14m v1.27.10+c79e5e23. Wait until Cluster Policy is ready
Note: This step may take a few minutes to complete.
oc wait --for=jsonpath='{.status.state}'=ready clusterpolicy \
gpu-cluster-policy -n nvidia-gpu-operator --timeout=600s4. Nvidia SMI tool verification
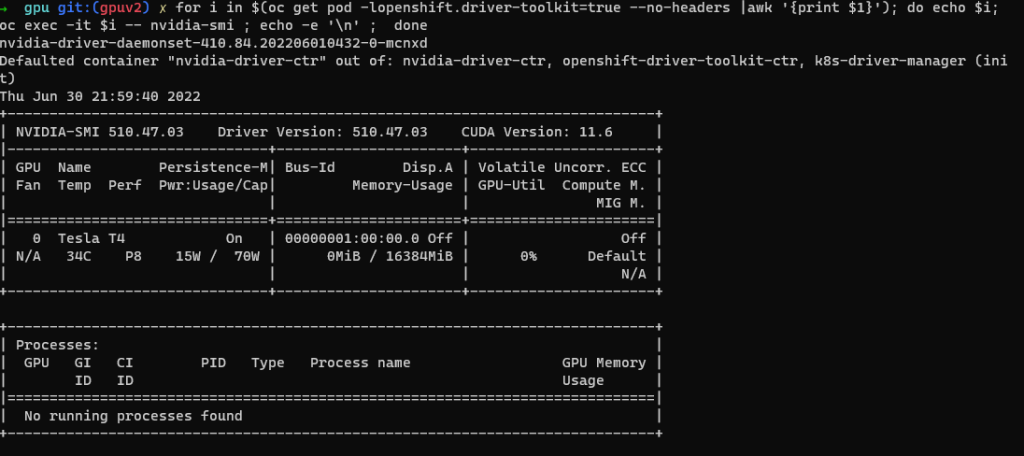
oc project nvidia-gpu-operator
for i in $(oc get pod -lopenshift.driver-toolkit=true --no-headers |awk '{print $1}'); do echo $i; oc exec -it $i -- nvidia-smi ; echo -e '\n' ; doneYou should see output that shows the GPUs available on the host such as this example screenshot. (Varies depending on GPU worker type)
5. Create Pod to run a GPU workload
oc project nvidia-gpu-operator
cat <<EOF | oc apply -f -
apiVersion: v1
kind: Pod
metadata:
  name: cuda-vector-add
spec:
  restartPolicy: OnFailure
  containers:
    - name: cuda-vector-add
      image: "quay.io/giantswarm/nvidia-gpu-demo:latest"
      resources:
        limits:
          nvidia.com/gpu: 1
      nodeSelector:
        nvidia.com/gpu.present: true
EOF6. View logs
oc logs cuda-vector-add --tail=-1Please note, if you get an error “Error from server (BadRequest): container “cuda-vector-add” in pod “cuda-vector-add” is waiting to start: ContainerCreating”, try running “oc delete pod cuda-vector-add” and then re-run the create statement above. I’ve seen issues where if this step is ran before all of the operator consolidation is done it may just sit there.
You should see Output like the following (mary vary depending on GPU):
[Vector addition of 5000 elements]
Copy input data from the host memory to the CUDA device
CUDA kernel launch with 196 blocks of 256 threads
Copy output data from the CUDA device to the host memory
Test PASSED
Done7. If successful, the pod can be deleted
oc delete pod cuda-vector-add
Leave a Reply