This article was originally published at Setup a VPN Connection into an ARO Cluster with OpenVPN | Red Hat Cloud Experts
When you configure an Azure Red Hat OpenShift (ARO) cluster with a private only configuration, you will need connectivity to this private network in order to access your cluster. This guide will show you how to configute a point-to-site VPN connection so you won’t need to setup and configure Jump Boxes.
Prerequisites
- a private ARO Cluster
- git
- openssl
Create certificates to use for your VPN Connection
There are many ways and methods to create certificates for VPN, the guide below is one of the ways that works well. Note, that whatever method you use, make sure it supports “X509v3 Extended Key Usage”.
1. Clone OpenVPN/easy-rsa
git clone https://github.com/OpenVPN/easy-rsa.git2. Change to the easyrsa directory
cd easy-rsa/easyrsa33. Initialize the PKI
./easyrsa init-pki4. Edit certificate parameters
Copy the sample values file
cp pki/vars.example pki/varsUncomment and edit the copied template with your values
vim pki/varsset_var EASYRSA_REQ_COUNTRY "US"
set_var EASYRSA_REQ_PROVINCE "California"
set_var EASYRSA_REQ_CITY "San Francisco"
set_var EASYRSA_REQ_ORG "Copyleft Certificate Co"
set_var EASYRSA_REQ_EMAIL "me@example.net"
set_var EASYRSA_REQ_OU "My Organizational Unit"Uncomment (remove the #) the folowing field
#set_var EASYRSA_KEY_SIZE 20485. Create the CA:
./easyrsa build-ca nopass6. Generate the Server Certificate and Key
./easyrsa build-server-full server nopass7. Generate Diffie-Hellman (DH) parameters
./easyrsa gen-dh8. Generate client credentials
./easyrsa build-client-full azure nopass9. Set environment variables for the CA certificate you just created.
CACERT=$(openssl x509 -in pki/ca.crt -outform der | base64)Set Envrionment Variables
AROCLUSTER=<cluster name>
ARORG=<resource group the cluster is in>
UNIQUEID=$RANDOM
LOCATION=$(az aro show --name $AROCLUSTER --resource-group $ARORG --query location -o tsv)
VNET_NAME=$(az network vnet list -g $ARORG --query '[0].name' -o tsv)
GW_NAME=${USER}_${VNET_NAME}
GW_SUBNET_PREFIX=e.g. 10.0.7.0/24 choose a new available subnet in the VNET your cluster is in.
VPN_PREFIX=172.18.0.0/24Create an Azure Virtual Network Gateway
1. Request a public IP Address
az network public-ip create \
-n $USER-pip-$UNIQUEID \
-g $ARORG \
--allocation-method Static \
--sku Standard \
--zone 1 2 3

pip=$(az network public-ip show -g $ARORG --name $USER-pip-$UNIQUEID --query "ipAddress" -o tsv)2. Create a Gateway Subnet
az network vnet subnet create \
--vnet-name $VNET_NAME \
-n GatewaySubnet \
-g $ARORG \
--address-prefix $GW_SUBNET_PREFIX3. Create a virtual network gateway
az network vnet-gateway create \
--name  $GW_NAME \
--location $LOCATION \
--public-ip-address $USER-pip-$UNIQUEID \
--resource-group $ARORG \
--vnet $VNET_NAME \
--gateway-type Vpn \
--sku VpnGw3AZ \
--address-prefixes $VPN_PREFIX \
--root-cert-data pki/ca.crt \
--root-cert-name $USER-p2s \
--vpn-type RouteBased \
--vpn-gateway-generation Generation2 \
--client-protocol IkeV2 OpenVPNgo grab a coffee, this takes about 15 – 20 minutes
Configure your OpenVPN Client
1. Retrieve the VPN SettingsFrom the Azure Portal – navigate to your Virtual Network Gateway, point to site configuration, and then click Download VPN Client.
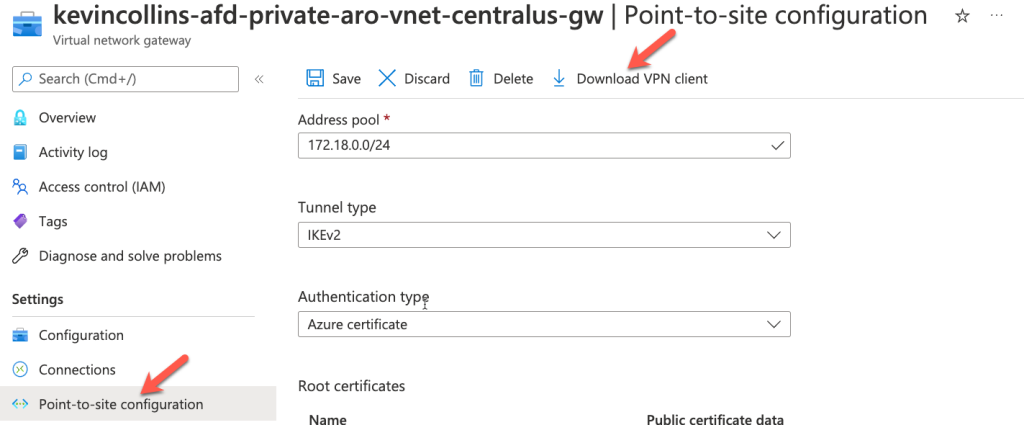
This will download a zip file containing the VPN Client
2. Create a VPN Client Configuration
Uncompress the file you downloaded in the previous step and edit the OpenVPN\vpnconfig.ovpn file.
Note: The next two commands assume you are still in the easyrsa3 directory.
In the vpnconfig.ovpn replace the $CLIENTCERTIFICATE line with the entire contents of:
openssl x509 -in pki/issued/azure.crtMake sure to copy the —–BEGIN CERTIFICATE—– and the —–END CERTIFICATE—– lines.
Also replace $PRIVATEKEY line with the output of:
cat pki/private/azure.keyMake sure to copy the —–BEGIN PRIVATE KEY—– and the —–END PRIVATE KEY—– lines.
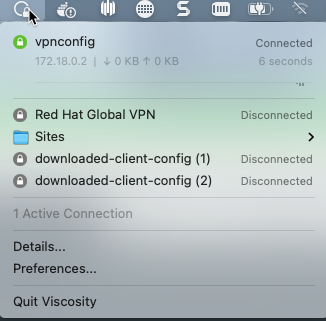
3. Add the new OpenVPN configuration file to your OpenVPN client.
mac users – just double click on the vpnserver.ovpn file and it will be automatically imported.
4. Connect your VPN.
Leave a Reply